One common problem I’ve heard from clients is when someone accidentally edits their sheets 💔, causing everything to go haywire.
When to Protected Cells?
Accidental edits are an all-too-common issue when working with shared spreadsheets. Whether it’s a misplaced formula or an altered value, these little mishaps can quickly throw your data off course. Protecting your cells becomes essential when you’re collaborating with others, but still need to ensure that key parts of your spreadsheet—like formulas, important data points, or structured templates—remain untouched.
Here’s when you should consider locking down cells:
- Important Calculations: If you have complex formulas that drive essential metrics or analysis, protect them from being overwritten.
- Templates: For any templates shared with collaborators or clients, where only certain cells should be filled in.
- Shared Reports: In situations where multiple contributors are entering data, but you want to control what can or can’t be modified.
The simplest way to prevent accidental edits is by setting your sheet to View-Only. This method restricts users from making any changes to the data while still allowing them to view the information. It’s perfect when you want to share your work without risking any unwanted edits.
Here’s how you can apply View-Only access:
- Click Share – Click on the Share button in the top-right corner of Google Sheets.
- Edit Permissions – Add the email addresses of your collaborators. Then, select Viewer under the permissions dropdown.
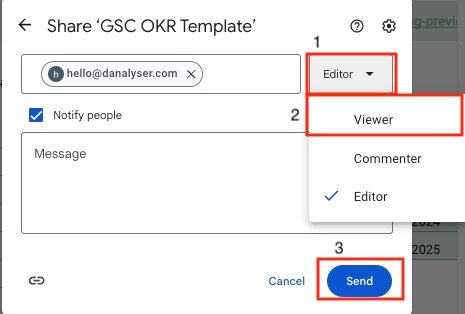
- Send the Invite – Once you’ve set the appropriate permissions, hit Send, and your sheet is now locked for viewing only!
Tips: If you want to grant anyone with the link the viewer access, simply select Viewer for the General access.
This approach is particularly useful for reports, dashboards, or any data-heavy sheets where users just need to observe, not interact. It’s the ultimate “hands-off” way to protect your hard work while still sharing your insights.
However, granting View-Only Access doesn’t work well if you need the collaborators to edit on the same spreadsheets. In this case, you’ll need the “Protected Cells” features which we’ll discuss in Method #2 and Method #3.
Method # 2 – Lock Specific Sheet(s)
You want to give collaborators editing rights but need to keep certain sheets protected? That’s where locking specific sheets comes in handy. This method allows you to control access on a sheet-by-sheet basis, ensuring that key areas remain protected while others stay open for edits.
Here’s how to lock specific sheets:
- Right-Click the Tab – Navigate to the sheet you want to protect, right-click on the tab, and select Protect the sheet.

- Select Sheets to Protect – A sidebar will pop up. Select Sheet tab, then select the sheet name to protect.
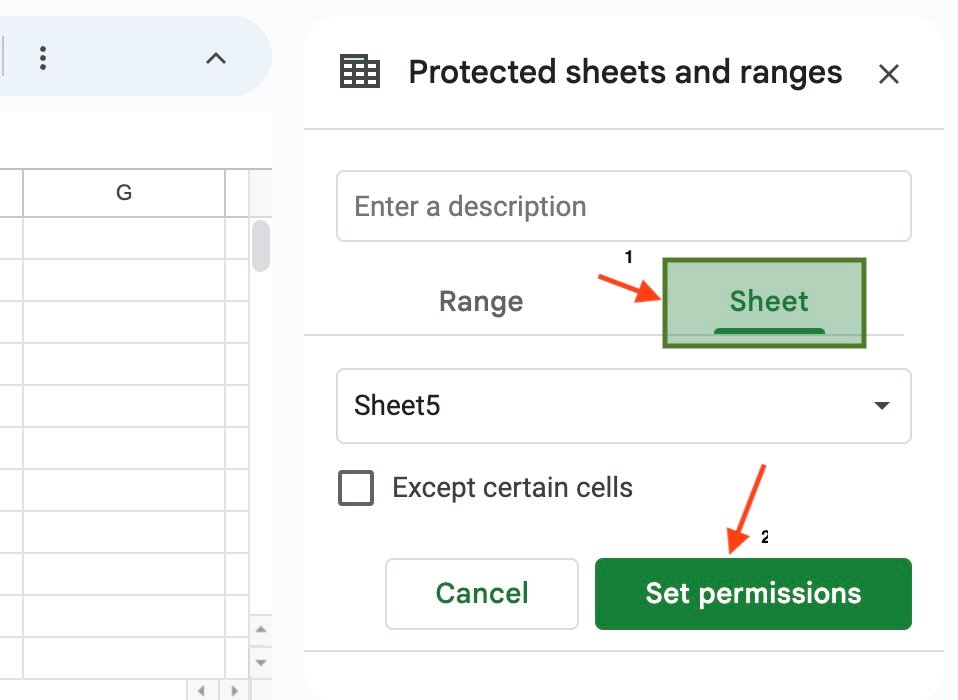
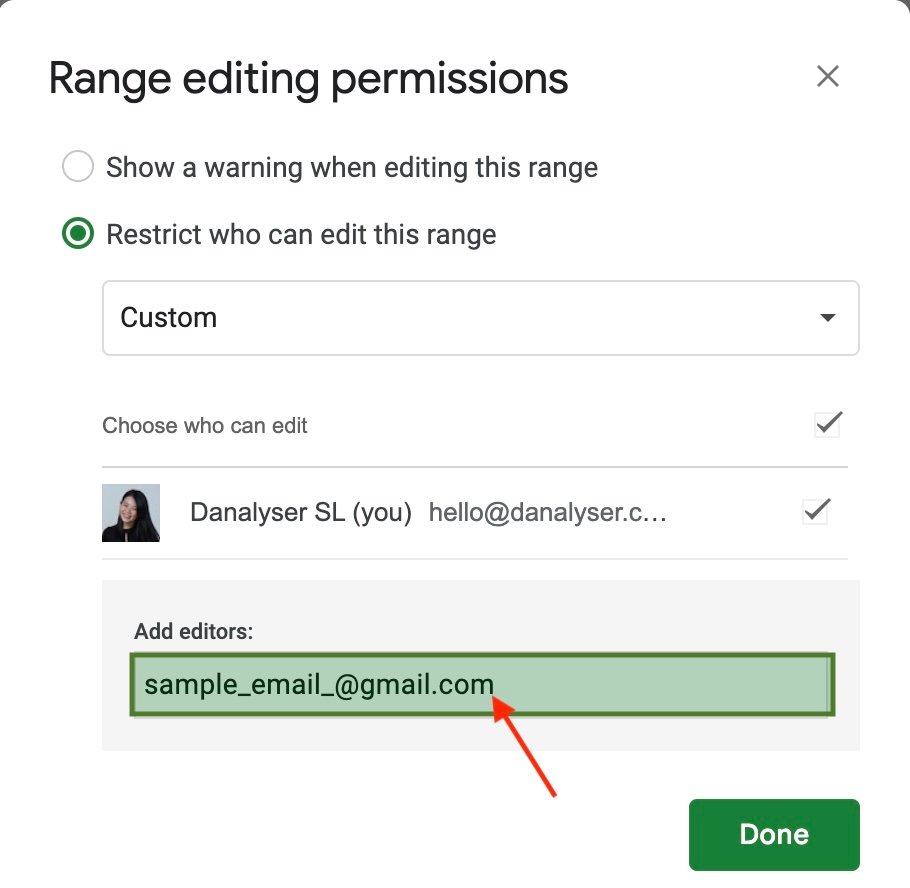
- Set Permissions – Click on Set permissions to decide who can edit the sheet. By default, only you will have access, but you can customize this by adding trusted collaborators. In the window, enter the email addresses of the collaborators to grant them edit access.
- Apply Changes – After choosing who can edit the sheet, click Done to lock the sheet.
Method # 3 – Lock Cell or Cell Ranges
When you have critical data or formulas on the same page where collaborators need to input information, it’s important to maintain control over which areas are editable.
Here’s how you can lock specific cells or ranges:
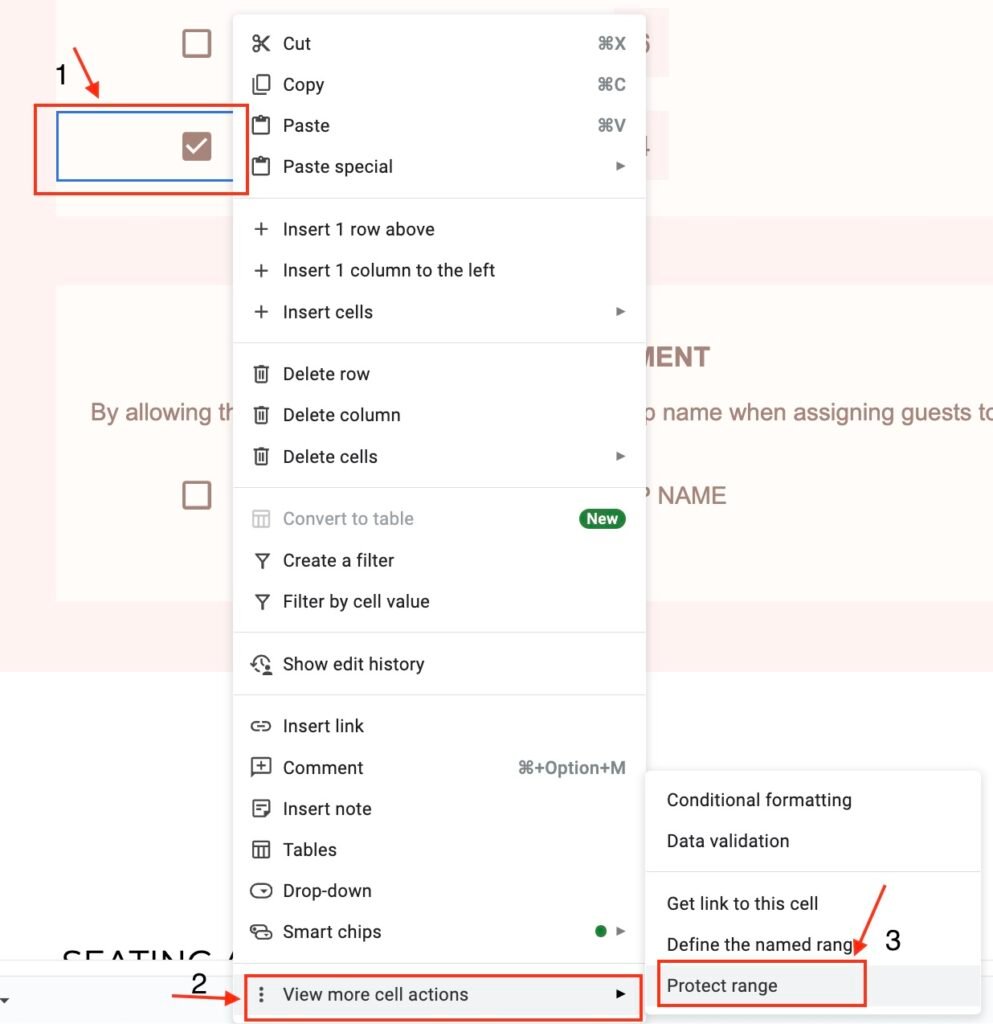
- Highlight the Cells/Range – Select the cells or range you want to protect from edits.
- Protect Cells – Right-click on the highlighted area, select “View more cell actions”, then select “Protect range” from the dropdown menu.
- Set Permissions – A sidebar will open, allowing you to set permissions. You can restrict access to only yourself or specify who can edit those particular cells or ranges. After configuring the permissions, click Done, and your selected cells are now protected.
Summary
In collaborative environments, protecting your Google Sheets is essential to maintaining data accuracy and preventing unwanted changes. Whether you opt for View-Only Access for complete control, lock entire sheet(s), or safeguard specific cells, each method offers a tailored solution depending on your needs. By using these features, you can confidently collaborate without worrying about accidental edits or lost data.